
How to Make a Tufted Rug: A Step-by-Step Guide
Tufting has gained popularity as a modern and creative way to make unique, handmade rugs. Unlike traditional hand-knotting, learning how to make a tufted rug is faster, more accessible, and allows for bold textures, intricate patterns, and vibrant colors. Whether you’re a beginner looking to learn how to do rug tufting or aiming to refine your skills, this guide will walk you through every step of the process, from gathering materials to finishing your tufted rug like a professional.
As a professional tufter and artist, my journey into how to get into rug tufting has been one of creativity, precision, and hands-on craftsmanship. The rhythmic motion of the tufting gun against the stretched monk’s cloth became almost meditative for me, and over time, I learned how to perfect the technique, experiment with materials, and elevate my work. I’ll be sharing personal insights throughout this guide to help you avoid common mistakes and create a high-quality piece from the start.
Materials & Tools You’ll Need
Before diving into how to make a rug with a tufting gun, having the right materials is essential. Here’s what you’ll need:
- Tufting gun – The main tool used to insert yarn into the fabric. If you’ve ever wondered how to make a tufting gun, know that modifying an existing one requires knowledge of its mechanics and safety measures.
- Monk’s cloth – The preferred backing fabric, known for its tight weave that holds tufts securely.
- Yarn – Wool, acrylic, or bamboo silk are great choices depending on durability, texture, and finish. Understanding yarn choice is crucial for how to make hand tufted rugs that are long-lasting.
- Tufting frame – A sturdy wooden frame with carpet grippers to hold the fabric in place.
- Scissors or electric trimmer – Used for shaping and refining the rug’s surface. How to carve a tufted rug properly depends on using these tools correctly.
- Glue and backing fabric – Helps secure the yarn and add structure to the rug.
- Marker or projector – To transfer your design onto the fabric.
When I started learning how to make a rug with a rug gun, I experimented with different yarns and quickly learned that wool provides the best balance of softness and durability. Acrylic is budget-friendly and good for practice, but it doesn’t hold up as well over time.
Step 1: Preparing Your Design & Workspace
Tufting begins long before you pick up the gun. Proper preparation ensures a smooth process and professional results.
- Create your design. Sketch it digitally or directly onto the monk’s cloth using a fabric marker. I often use a projector to outline complex designs for better accuracy.
- Set up your tufting frame. Stretch the monk’s cloth tightly over the frame to prevent sagging. Secure it using carpet grippers or a staple gun.
- Organize your materials. Have your yarns pre-cut and your tufting gun loaded to avoid unnecessary interruptions.
When I first started figuring out how to make a tufted rug at home, I underestimated the importance of a taut backing fabric. Loose fabric leads to uneven tufts and an unstable rug. Keeping the fabric stretched properly is crucial for clean, consistent work.
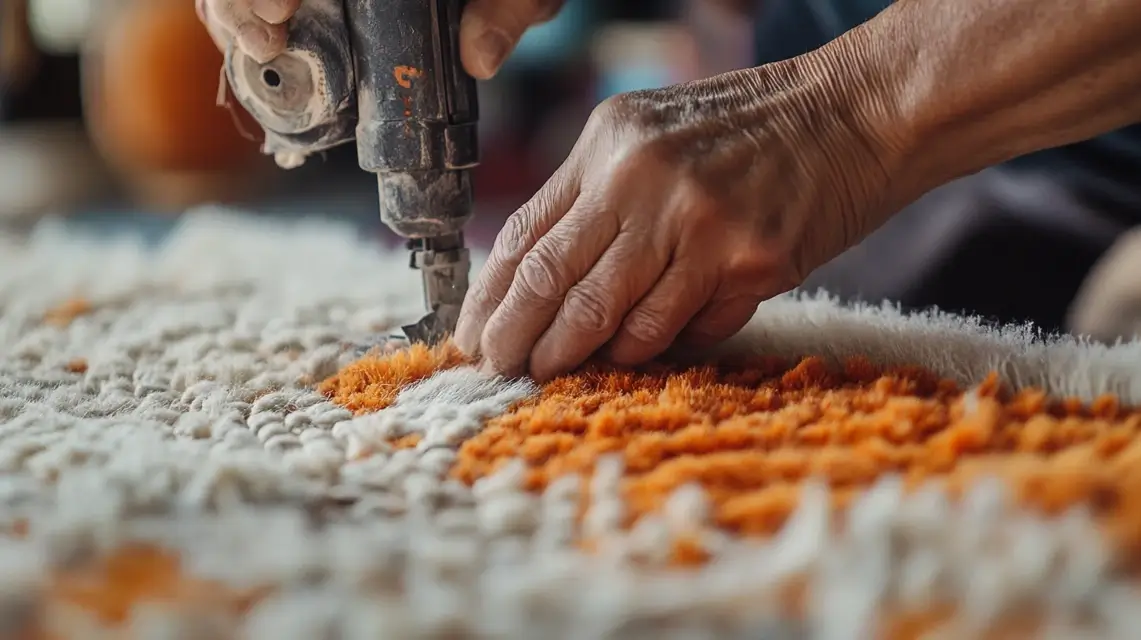
Step 2: Tufting Techniques & Best Practices
Now comes the fun part—tufting the design. This step requires patience and control.
- Hold the tufting gun correctly. Keep a firm grip and maintain steady pressure against the fabric to create even tufts.
- Work in sections. Start from the inside of your design and work outward. This prevents accidental overlapping and ensures a clean result.
- Understand pile types. Loop pile creates tight, durable loops, while cut pile gives a plush, soft texture. Some artists mix both for added dimension.
One of my breakthrough moments when learning how to do tufting rug was controlling depth and consistency. Initially, I applied too much pressure, causing irregular tufts. With practice, I found that letting the gun glide smoothly over the surface, rather than forcing it, resulted in a more even finish.
Step 3: Trimming, Backing & Finishing Your Rug
Finishing a tufted rug is what transforms it from a rough piece of fabric into a polished, professional product.
- Apply carpet adhesive. Flip the rug and apply a strong glue to secure the tufts. Let it dry for at least 24 hours.
- Trim and shape the rug. Use scissors or an electric trimmer to cut excess fibers and define the edges. Learning how to carve a tufted rug properly ensures a crisp, professional look.
- Attach the backing fabric. Cut a piece of felt or canvas slightly smaller than the rug and glue or sew it onto the back for a clean, finished look.
When I first started, my rugs looked messy because I skipped proper trimming. A high-quality finish requires precision—trimming uneven fibers, smoothing out glue application, and ensuring the backing is secure.
Common Mistakes & How to Avoid Them
Even experienced tufters run into challenges. Here are some common mistakes and how to fix them:
- Uneven pile height – This happens when the tufting gun moves at inconsistent speeds. Keep a steady hand and pace.
- Loose yarn tufts – Often caused by weak glue application. Always use a high-strength adhesive and let it dry completely.
- Fabric tearing – If the monk’s cloth rips, your tension may be too tight, or the gun is moving too aggressively. Adjust the pressure accordingly.
When learning how to make rugs with a tufting gun, I struggled with uneven pile heights, leading to rugs that looked patchy. By slowing down and maintaining a consistent rhythm, I was able to create more professional results.
Creative Ideas & Advanced Techniques
Once you’ve mastered how to make your own tufted rug, you can experiment with advanced techniques:
- Multi-texture tufting – Combining loop pile and cut pile for a layered effect.
- Gradient shading – Blending yarn colors for smooth transitions.
- Carving details – Using a trimmer to sculpt patterns into the rug.
I love incorporating mixed textures into my designs. By alternating between loop and cut pile, I can add visual and tactile contrast, making the rug more dynamic and eye-catching.
Conclusion
Tufting is more than just a craft—it’s an art form that merges functionality with creativity. From selecting materials to mastering finishing techniques, every step adds to the quality and uniqueness of your piece. Whether you’re learning how to make a hand tufted rug for personal use or to sell, patience and practice will help refine your skills.
When I see a tufted rug I’ve made become part of someone’s home, it’s a deeply rewarding experience. Handmade rugs carry an artisanal touch that mass-produced versions simply can’t replicate. If you’re starting your journey in how to make rugs with gun techniques, embrace the learning process and enjoy bringing your designs to life.
Now that you have the knowledge, it’s time to create your own tufted rug. Happy tufting!