

Yarn Winder: Effortless Tufting for Streaming Your Process 🧶
The art of tufting: A creative and intricate craft
In the world of textile arts, tufting stands out as a captivating and intricate craft. With its origins dating back centuries, tufting has evolved into a versatile and expressive form of textile design. From exquisite rugs and tapestries to cozy blankets and decorative pillows, tufted creations add texture, color, and character to any space.
Tufting involves the process of creating loops or pile on a fabric base using yarn or thread. This technique allows artists and artisans to create intricate patterns, three-dimensional textures, and captivating designs. The beauty of tufting lies in its ability to blend traditional craftsmanship with contemporary artistic expression.
The need for efficiency and convenience in tufting
While tufting is undoubtedly a rewarding and fulfilling craft, it is not without its challenges. One of the key considerations for tufting enthusiasts is the need for efficiency and convenience in their creative process. As the intricate nature of tufting requires time and precision, any tool or equipment that can streamline the process becomes invaluable.
Introducing the yarn winder: A game-changer for tufting enthusiasts
Enter the yarn winder, a revolutionary tool that has taken the tufting community by storm. Designed specifically for tufting enthusiasts, the yarn winder offers a range of benefits that enhance the overall tufting experience. With its innovative features and user-friendly design, the yarn winder has quickly become a game-changer for artists and artisans in the world of tufting.
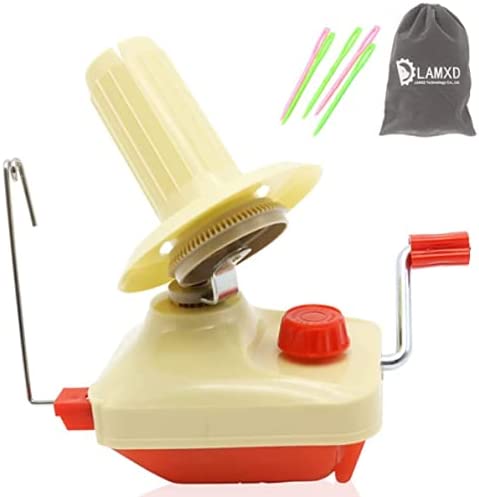
LAMXD Needlecraft Yarn Ball Winder
The Yarn Winder Explained
What is a yarn winder?
In the world of fiber arts, a yarn winder is a vital tool that simplifies the process of preparing yarn for knitting, crocheting, and other textile crafts. It is designed to transform skeins or hanks of yarn into more manageable and organized forms, such as balls or cakes.
A yarn winder typically consists of a central spindle and a mechanism that allows the yarn to be wound smoothly and evenly. It is a time-saving and convenient device that has become a staple for both hobbyists and professional fiber artists.
How does a yarn winder work?
The working principle of a yarn winder involves the careful winding of yarn from its original skein or hank onto a designated holder or center-pull bobbin. The yarn is guided through the winder’s mechanism, which rotates the bobbin while simultaneously creating tension to ensure neat and consistent winding.
As the yarn is wound, it forms a compact and organized shape, eliminating tangles and making it easier to work with. This process not only saves time during the crafting process but also allows for smoother yarn feed, resulting in more even stitches and better tension control.
Different types of yarn winders: Manual vs. electric
Manual Yarn Winders
Manual yarn winders are operated by hand and are a popular choice for crafters of all levels. They offer a simple yet effective way to wind yarn, allowing users to control the speed and tension during the winding process. Manual winders are often lightweight and portable, making them ideal for those who enjoy crafting on the go or attending knitting circles.
Electric Yarn Winders
For those seeking convenience and efficiency, electric yarn winders are a game-changer. These advanced devices automate the winding process, taking the strain off your hands and allowing you to wind yarn effortlessly with the push of a button. Electric winders are equipped with powerful motors that rotate the bobbin at a consistent speed, ensuring smooth and precise winding every time.
Electric yarn winders are particularly beneficial for individuals working on large projects or dealing with a high volume of yarn. They provide a faster winding speed and can handle thicker or more challenging yarns with ease.
When choosing between a manual or electric yarn winder, consider your specific needs, preferences, and budget. Both options offer their own advantages, and it ultimately comes down to personal preference and the scale of your crafting endeavors.

Advantages of Using a Yarn Winder
In the world of tufting and fiber arts, incorporating a yarn winder into your crafting arsenal can offer a multitude of advantages. From saving time and achieving consistent tension to reducing hand fatigue and maintaining yarn organization, the benefits are plentiful. Let’s explore these advantages in detail:
Time-saving benefits: Streamlining the tufting process
One of the most significant advantages of using a yarn winder is the time-saving aspect it brings to the tufting process. With a yarn winder, you can swiftly transform skeins or hanks of yarn into organized and easily usable forms, such as center-pull balls or cakes. This eliminates the need for manual winding, which can be time-consuming and prone to tangles and knots. The efficient operation of a yarn winder allows you to spend more time on the creative aspects of tufting rather than struggling with yarn preparation.
Consistent tension control: Achieving uniform tufts
Achieving consistent tension is essential in tufting to create uniform and visually pleasing tufts. A yarn winder plays a vital role in maintaining tension control throughout the winding process. By guiding the yarn smoothly and evenly onto the bobbin, the winder ensures that the tension remains constant, resulting in consistent tufting. This level of control is particularly beneficial when working on intricate designs or projects that require precise tension adjustments.
Reduction in hand fatigue: Enhanced comfort and endurance
For tufting enthusiasts who spend extended periods working with yarn, hand fatigue can be a real concern. Constantly winding yarn by hand can strain the muscles and cause discomfort over time. However, with a yarn winder, this burden is alleviated. By automating the winding process, a yarn winder reduces the repetitive motion and effort required from your hands, resulting in enhanced comfort and endurance. This allows you to focus on the tufting itself without the distraction of discomfort or fatigue.
Yarn organization and storage: Keeping your workspace tidy
Keeping your tufting workspace organized is essential for a smooth and enjoyable crafting experience. A yarn winder assists in achieving this goal by providing a structured and organized approach to yarn storage. By winding your yarn into neat and compact forms, such as center-pull balls or cakes, you can easily store and access your yarn collection. This not only keeps your workspace tidy but also prevents tangles, knots, and yarn wastage. A well-organized workspace allows you to stay focused on your creative process and eliminates unnecessary interruptions.
Choosing the Right Yarn Winder
When it comes to choosing the right yarn winder for your tufting endeavors, several factors come into play. From considering compatibility with different yarn types to evaluating durability and size, finding the perfect yarn winder requires careful consideration. Let’s delve into each aspect in detail:
Factors to consider when selecting a yarn winder
Before making a decision, it’s important to consider various factors that will influence your choice of yarn winder. Firstly, think about the volume of tufting projects you undertake. If you work on larger-scale projects or have a high production demand, you may want to opt for a yarn winder with a higher capacity and faster winding speed. On the other hand, if you mainly focus on smaller, intricate designs, a compact winder with precise control may be more suitable.
Another factor to consider is your level of experience and comfort with different winding techniques. Some yarn winders offer additional features such as adjustable tension, multiple winding speeds, or interchangeable bobbin sizes, which can provide greater versatility for experienced tufters. Beginners may prefer a more straightforward and user-friendly winder to start their journey.
Types of yarn compatible with different winders
It’s essential to ensure that the yarn winder you choose is compatible with the types of yarn you frequently work with. Most winders can accommodate a wide range of yarn weights and textures, but it’s always advisable to check the specifications provided by the manufacturer. Thick and bulky yarns may require a winder with larger bobbin sizes and robust construction to handle the extra weight, while delicate or specialty yarns may benefit from a winder with gentle tension control.
Evaluating durability and build quality
Investing in a durable and well-built yarn winder is crucial for long-term use and optimal performance. Look for winders made from high-quality materials such as sturdy plastic or metal components that can withstand the rigors of frequent winding. Additionally, pay attention to the construction of the winder, ensuring it is stable and has a smooth winding mechanism that operates without jamming or slipping. Reading customer reviews and seeking recommendations from experienced tufters can also provide valuable insights into the durability and reliability of different yarn winders.
Size and portability: Finding the right fit for your workspace
Consider the available space in your tufting area when selecting a yarn winder. If you have limited space, a compact and lightweight winder that can be easily stored when not in use may be ideal. Conversely, if space is not a constraint, a larger winder with a sturdy base can provide stability during winding. Additionally, if you often travel or attend tufting workshops, a portable yarn winder that is lightweight and easy to transport can be advantageous.
In conclusion, choosing the right yarn winder is a crucial step in enhancing your tufting experience. By considering factors such as winding capacity, yarn compatibility, durability, and size/portability, you can make an informed decision. Remember to assess your specific needs and preferences to find a yarn winder that aligns with your tufting goals. With the right tool at hand, you can embark on your tufting projects with confidence and efficiency.

Setting Up and Operating Your Yarn Winder
Setting up and operating a yarn winder may seem daunting at first, but with a step-by-step approach and attention to detail, you’ll be ready to wind your yarn with ease. In this section, we will guide you through the process of assembling your yarn winder, positioning and threading the yarn correctly, adjusting the tension for optimal winding, and troubleshooting common issues that may arise.
Step-by-step guide to assembling your yarn winder
- Start by unpacking all the components of your yarn winder and familiarize yourself with each part. Typically, a yarn winder consists of a base, a central spindle, a handle, and various attachments.
- Place the base on a flat and stable surface, ensuring it is secure and won’t wobble during operation. Check for any assembly instructions provided by the manufacturer and follow them accordingly.
- Attach the central spindle to the base by aligning the slots or grooves and gently pushing it in until it locks securely. Some yarn winders may have additional mechanisms for stabilizing the spindle, so refer to the instructions if applicable.
- Next, attach the handle to the spindle. This is usually done by inserting the handle into the designated slot and turning it clockwise until it is firmly in place. Ensure the handle rotates smoothly without any resistance.
Proper yarn positioning and threading
- Before you begin winding, it’s important to position the yarn correctly for smooth operation. Place the yarn cone or ball on a yarn holder or secure it to prevent it from rolling or tangling during winding.
- Locate the yarn guide or yarn guide arm on your yarn winder. This is where the yarn will pass through before being wound onto the spindle. Ensure the yarn guide is in the open position and aligned with the central spindle.
- Take the end of the yarn and thread it through the yarn guide. Some yarn winders may have specific threading paths, so refer to the instructions provided by the manufacturer for the optimal threading technique.
Adjusting tension for optimal winding
- Proper tension is crucial for achieving well-wound yarn cakes or balls. Most yarn winders have tension adjustment mechanisms to control the tightness of the winding. Familiarize yourself with the specific tension adjustment options on your yarn winder.
- Start by setting the tension to a moderate level and test the winding. If the yarn is too loose or slipping, tighten the tension slightly. Conversely, if the yarn is too tight or causing excessive resistance, loosen the tension accordingly.
- Experiment with different tension settings until you find the optimal balance that results in evenly wound yarn cakes without stretching or distorting the yarn.
Troubleshooting common issues
- If you encounter issues such as yarn breakage or tangling during winding, check the threading path and ensure the yarn is properly guided through the yarn guide and around the spindle.
- In case of uneven winding or irregular tension, adjust the tension settings gradually until the desired outcome is achieved. Remember, small adjustments can make a significant difference in the winding process.
- If the handle feels stiff or the winding motion becomes difficult, check for any obstructions or debris that may be hindering the rotation. Clean and lubricate the moving parts as recommended by the manufacturer to maintain smooth operation.
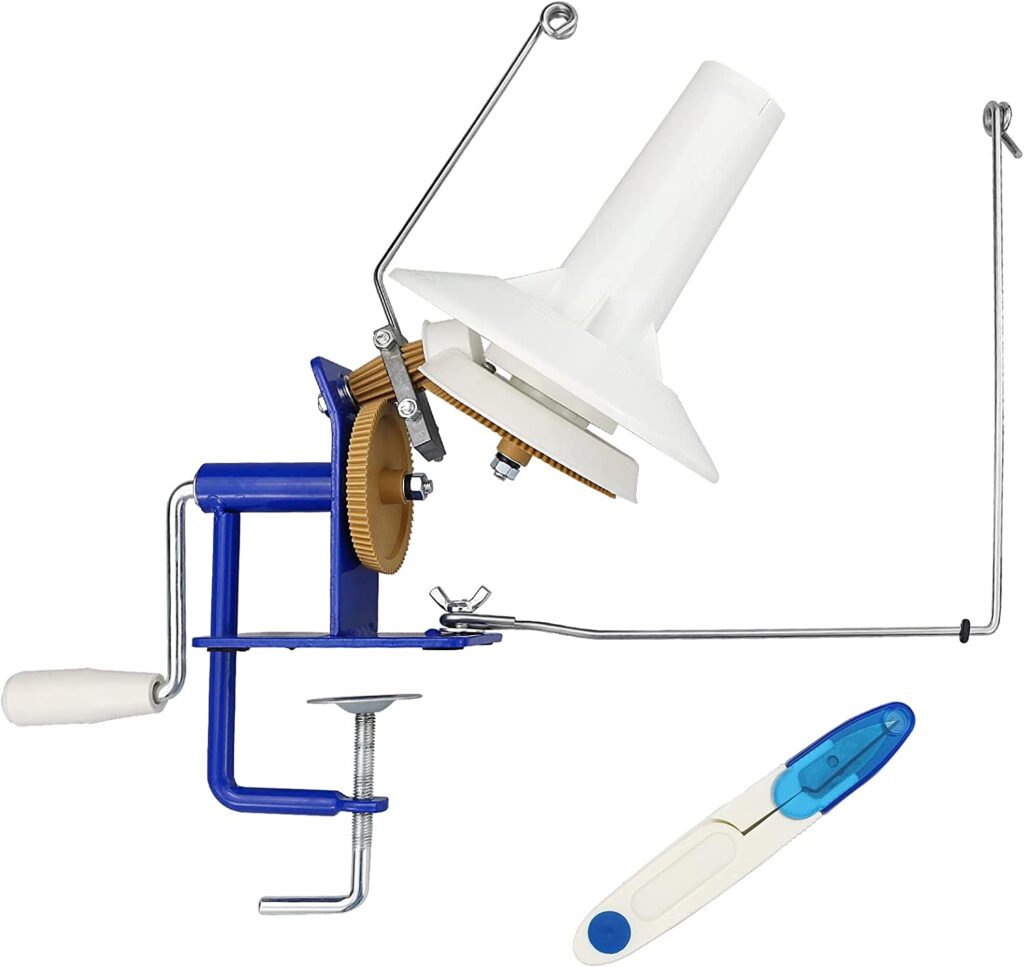
LAMXD Needlecraft Large Jumbo Metal Yarn/Wool/String/Fiber Ball Winder
Tips and Techniques for Efficient Tufting
Tufting is a fascinating craft that allows you to create stunning textiles and artworks with yarn. To ensure a smooth and efficient tufting process, it’s important to understand and apply various tips and techniques. In this article, we will explore valuable insights on selecting the right yarn, maximizing yarn usage, choosing the appropriate tufting tools, and experimenting with different tufting patterns and textures.
Selecting the right yarn for tufting
The choice of yarn plays a crucial role in the outcome of your tufting project. Consider the following factors when selecting yarn for tufting:
- Fiber type: Opt for yarns that are durable and suitable for tufting. Wool, acrylic, and cotton are popular choices due to their strength and versatility.
- Yarn weight: The weight of the yarn determines the thickness and density of the tufts. Experiment with different yarn weights to achieve the desired texture and visual impact.
- Color selection: Choose yarn colors that complement your design concept. Consider the mood, theme, and overall aesthetic you wish to convey through your tufted piece.
Maximizing yarn usage: Preventing tangles and waste
To make the most of your yarn and minimize wastage, implement the following techniques:
- Preparing yarn skeins: Before starting a tufting project, wind the yarn into organized skeins or balls. This helps prevent tangles and ensures smooth and uninterrupted tufting.
- Tension management: Maintain consistent tension while tufting to avoid excessive yarn usage and tangling. Practice maintaining a steady rhythm and gentle pulling motion to achieve uniform tufting.
- Yarn management tools: Utilize yarn holders, organizers, or even improvised solutions like cardboard or pegboards to keep your yarn organized and easily accessible during the tufting process.
Choosing the appropriate tufting tool for different projects
Different tufting tools offer varying techniques and effects. Consider these options when choosing a tufting tool for your project:
- Tufting gun: Ideal for large-scale projects, tufting guns provide speed and efficiency in creating tufts. They are particularly useful for high-pile or thick yarns.
- Handheld tufting needle: A versatile tool that allows for intricate designs and fine detailing. Handheld tufting needles provide control and precision but require more time and patience.
- Punch needle: Similar to a tufting gun, punch needles offer a quick and efficient way to create tufts. They are suitable for both small and large-scale projects and offer a range of loop lengths and textures.
Exploring different tufting patterns and textures
One of the joys of tufting is the ability to experiment with patterns and textures. Here are some techniques to explore:
- Loop pile: Create loops by pulling the yarn through the fabric and leaving them uncut. Vary the loop lengths to achieve interesting textures and visual effects.
- Cut pile: Cut the loops to create a plush and velvety texture. Experiment with different cutting lengths to achieve varied pile heights and surface finishes.
- Combination techniques: Combine loop and cut pile tufting to create intricate designs and patterns. This allows for greater depth and dimension in your tufted artwork.
Remember to practice and experiment with different techniques to develop your own unique style in tufting. Embrace the creative possibilities and enjoy the journey of bringing your ideas to life through this versatile craft.
Maintenance and Care for Your Yarn Winder
Your yarn winder is a valuable tool that helps streamline your tufting process. To ensure its longevity and optimal performance, proper maintenance and care are essential. In this article, we will delve into the important aspects of cleaning and lubricating your yarn winder, storage tips to prolong its lifespan, and troubleshooting common issues that may arise during its usage.
Cleaning and lubricating the yarn winder
- Regular cleaning: After each use, it’s important to clean your yarn winder to remove any accumulated dust, fibers, or debris. Use a soft, lint-free cloth or a brush to gently wipe the surface of the winder. Pay attention to hard-to-reach areas and ensure all components are thoroughly cleaned.
- Dealing with yarn residue: Over time, yarn residue may build up on the spindle or other parts of the winder. To remove this residue, you can use a mild soap solution or specialized cleaning products recommended by the manufacturer. Be sure to follow the instructions provided and avoid using harsh chemicals that could damage the winder.
- Lubrication: Proper lubrication is crucial for maintaining smooth and effortless operation of your yarn winder. Consult the manufacturer’s guidelines for the recommended lubricant and apply it to the necessary parts as instructed. This helps reduce friction, prevents wear and tear, and extends the lifespan of your winder.
Storage tips to prolong the lifespan
- Clean and dry: Before storing your yarn winder, ensure that it is completely clean and dry. Moisture can lead to rust or damage the components, so it’s important to eliminate any dampness before storage.
- Protective cover or case: Consider investing in a protective cover or case specifically designed for your yarn winder. This helps shield it from dust, moisture, and potential accidental damage when not in use. It also makes it easier to store and keep track of your winder.
- Proper positioning: Store your yarn winder in a stable and upright position to prevent any stress or strain on the components. Avoid placing heavy objects on top of it or subjecting it to excessive pressure that could potentially deform or break delicate parts.
Troubleshooting common issues and repairs
- Tension problems: If you experience inconsistent tension while winding yarn, check for any loose or misaligned parts. Tighten or adjust them as necessary to ensure proper tension control. If the issue persists, consult the user manual or seek assistance from the manufacturer or an authorized repair center.
- Jammed or stuck components: In the event that your yarn winder becomes jammed or certain parts get stuck, avoid forcing or exerting excessive pressure. Carefully inspect the affected area and remove any obstructions or tangled yarn. If the problem persists, contact the manufacturer or seek professional repair services.
- Regular maintenance checks: Schedule periodic maintenance checks to identify and address any potential issues before they escalate. This includes inspecting screws, bolts, and other fasteners for tightness, examining moving parts for smooth operation, and lubricating as necessary.
Conclusion
As we come to the end of this article, it’s clear that the yarn winder is an invaluable tool for tufting enthusiasts. Its presence in the tufting process unlocks a multitude of benefits, ranging from increased efficiency to enhanced precision and creativity. Let’s recap the key points discussed throughout this article.
The yarn winder stands as a valuable tool that revolutionizes the tufting experience. By streamlining the process, it allows tufting enthusiasts to accomplish their projects more efficiently and effectively. With its ability to wind yarn into organized and manageable forms, the yarn winder saves time and effort, ensuring a smoother and more enjoyable tufting journey.
Precision is a hallmark of the yarn winder. Its consistent tension control enables tufters to achieve uniform tufts, resulting in a polished and professional finish. This level of control empowers artisans to execute their creative vision with greater accuracy, bringing their designs to life in a meticulous and eye-catching manner.
Furthermore, the yarn winder alleviates hand fatigue, granting tufters enhanced comfort and endurance. By minimizing the strain associated with manual winding, it allows artisans to immerse themselves fully in the tufting process, focusing on their creativity and craftsmanship without discomfort or limitations. This comfort factor proves crucial in long and intricate tufting sessions.
In addition to its functional advantages, the yarn winder also contributes to maintaining a tidy and organized workspace. With its ability to wind and store yarn in an orderly manner, it helps eliminate clutter and ensures that materials are readily accessible. A well-organized workspace fosters a sense of calm and clarity, enabling tufters to work efficiently and enjoy the creative process to the fullest.
In conclusion, embracing the joy of effortless tufting is made possible with the utilization of a yarn winder. This invaluable tool offers efficiency, precision, and creativity, propelling the tufting process to new heights. Whether you’re a seasoned tufter or just beginning your journey, incorporating a yarn winder into your toolkit will undoubtedly enhance your experience and elevate your creations.
So, why wait? Embrace the possibilities and take your tufting endeavors to the next level with a yarn winder. Unleash your creativity, explore new designs, and enjoy the process of tufting with ease and precision. Let the yarn winder become your trusted companion in this captivating craft, empowering you to weave beauty and artistry into every tufted creation.
Happy tufting!
FAQ
Do I need a yarn winder for tufting?
While a yarn winder is not a requirement for tufting, it can greatly enhance your tufting experience and offer several advantages. Let’s explore whether you need a yarn winder for tufting.
- Efficiency and Time-saving: One of the key benefits of using a yarn winder for tufting is the significant time saved. By quickly and efficiently winding yarn into organized and consistent forms, a yarn winder allows you to focus more on the tufting process itself rather than spending excessive time preparing the yarn. This can be especially beneficial if you are working on larger or more intricate tufting projects.
- Tension Control and Uniformity: Achieving consistent tension throughout your tufting work is crucial for producing a professional and polished result. A yarn winder helps maintain even tension as it winds the yarn, ensuring that your tufts are uniform and well-balanced. This level of precision can be challenging to achieve manually and can greatly improve the overall appearance of your tufted creations.
- Hand Fatigue Reduction: Tufting can be a labor-intensive process, especially when winding yarn by hand. A yarn winder can alleviate hand fatigue by taking over the repetitive winding task, allowing you to focus more on the artistic aspects of tufting without straining your hands. This can be particularly beneficial for longer tufting sessions or individuals with hand or wrist issues.
- Yarn Organization and Storage: Keeping your yarn organized and easily accessible is essential for a smooth and enjoyable tufting process. A yarn winder helps you neatly wind and store your yarn, preventing tangles, knots, and messiness. This organization not only saves time but also ensures that you have a clear view of your yarn colors and textures, making it easier to plan and execute your tufting designs.
Ultimately, the decision to use a yarn winder for tufting depends on your personal preferences, the scale of your projects, and your budget. If you are a casual tufter or primarily work on smaller projects, you may find that manual yarn winding suffices. However, if you are serious about tufting, want to maximize efficiency, achieve consistent tension, reduce hand fatigue, and maintain an organized workspace, investing in a yarn winder can greatly enhance your tufting process.
Remember that a yarn winder is just one tool in your tufting arsenal, and its inclusion can significantly contribute to the overall quality and enjoyment of your tufted creations.
How do you wind yarn for rug tufting?
Winding yarn for rug tufting is an essential step in the preparation process that ensures your yarn is organized, manageable, and ready for tufting. Here’s a step-by-step guide on how to wind yarn for rug tufting:
- Gather your materials: You will need yarn in the desired colors and textures for your rug tufting project, a yarn winder (optional but recommended), and a swift (optional but helpful).
- Set up your yarn winder: If you are using a yarn winder, assemble it according to the manufacturer’s instructions. Ensure that it is securely clamped or attached to a stable surface.
- Prepare the yarn: Start by finding the end of the yarn skein. If using a swift, place the skein on the swift to hold it in place and prevent tangling. If you don’t have a swift, you can work directly from the skein or use a yarn holder to keep the skein stable.
- Begin winding: Hold the end of the yarn securely and guide it through the yarn winder’s guide or loop. If you’re not using a yarn winder, hold the end of the yarn in your hand.
- Start the winding process: Turn the handle or crank of the yarn winder or manually rotate the skein if you’re winding by hand. As you turn, the yarn will begin to wind around the winder or your hand.
- Maintain tension: Apply gentle tension to the yarn as it winds to ensure it wraps evenly and snugly around the winder or your hand. Avoid pulling too tightly, as it may stretch or distort the yarn.
- Wind the entire skein: Continue winding until you have wound the entire skein of yarn. If using a yarn winder, you can wind multiple skeins onto a single bobbin or create separate bobbins for each color. If winding by hand, you can create yarn balls or cakes.
- Secure the wound yarn: Once the yarn is fully wound, secure the end by tucking it under several wraps of the wound yarn. This prevents the yarn from unraveling during storage or tufting.
- Repeat for additional colors: If your tufting project requires multiple colors, repeat the winding process for each color, creating separate bobbins or balls.
By following these steps, you can wind your yarn efficiently and effectively for rug tufting. Wound yarn provides better tension control, reduces tangling, and facilitates a smooth and enjoyable tufting process. Remember to store your wound yarn in a clean and organized manner, ready to be used in your rug tufting project.
What is the best kind yarn for tufting machine?
When it comes to choosing the best yarn for a tufting machine, there are a few factors to consider. The ideal yarn for tufting should have specific characteristics that allow for smooth operation and produce desired results. Here are some types of yarn commonly used with tufting machines:
- Acrylic Yarn: Acrylic yarn is a popular choice for tufting machines due to its affordability, durability, and wide range of available colors. It has good resistance to fading and is relatively easy to work with.
- Wool Yarn: Wool yarn offers a luxurious feel and excellent durability, making it a top choice for high-end tufted products. It provides a soft texture and good resilience, giving tufted rugs a plush appearance.
- Blended Yarn: Blended yarns, such as wool/acrylic blends or cotton/acrylic blends, combine the desirable qualities of different fibers. These blends can offer the best of both worlds, providing durability, softness, and ease of use.
- Chenille Yarn: Chenille yarn features a velvety texture and is often used for creating tufted rugs with a luxurious and plush finish. It produces a beautiful pile and is available in various colors.
- Polyester Yarn: Polyester yarn is known for its strength, abrasion resistance, and colorfastness. It is an excellent choice for tufting projects that require durability and vibrant colors.
When selecting yarn for a tufting machine, it’s essential to consider the weight or thickness of the yarn, as it can impact the tufting process. Thicker yarns may require adjustments to the machine settings to accommodate their bulk, while finer yarns can result in more intricate and detailed designs.
Additionally, it’s important to ensure that the yarn you choose is compatible with your specific tufting machine. Some machines may have specific requirements in terms of yarn thickness or construction.
Ultimately, the best yarn for your tufting machine will depend on your specific project requirements, desired aesthetics, and personal preferences. It’s recommended to experiment with different yarn types and brands to find the one that works best for you in terms of performance and the final appearance of your tufted creations.